
Your iPhone photo looks fine in Photos, but the moment you try to attach it to a form, email it to someone who doesn’t use Apple tools, or save it for records, the file type becomes the problem. If the image is in HEIC, you’re probably trying to turn it into a PDF because that’s the format the other side wants.
The catch is that how to convert HEIC to PDF on iPhone is really two jobs, not one. A single photo needs one kind of conversion, while a stack of photos needs a multi-page document, and iPhone handles those two tasks very differently.
Apple’s current setup helps explain why this comes up so often. iPhones started storing still images with HEIF and HEVC in iOS 11, released in September 2017, and Apple says that support is built into iOS 11 and later, iPadOS, and macOS High Sierra 10.13 and later, so compatible devices can view and edit those files natively Apple Support. That’s great inside Apple’s ecosystem, but PDF is the safer delivery format when you need to submit a file, archive it, or move it into older software.
For a quick background on what HEIC is, see this HEIC overview. The important point here is simple: the photo may be perfectly valid, but the destination may not accept the wrapper it came in.
Practical rule: if the other side needs a form-ready attachment, a printable archive, or a file that opens without asking questions, PDF is usually the safer wrapper.
By the end of this guide, you’ll know when a native iPhone method is enough, when it falls short, and how to check whether the final PDF is submission-ready.
Table of Contents
- Why Converting HEIC to PDF on iPhone Takes Two Paths
- Turning One HEIC Photo Into a PDF With the Files App
- Combining Multiple HEICs Into One Multi-Page PDF
- Choosing Between Native, Print-Preview, and Browser Converters
- Controlling Page Size, Quality, and Metadata Before You Convert
- Why Your Converted PDF Might Still Get Rejected
- Quick Decision Guide for Your Next HEIC to PDF Job
Why Converting HEIC to PDF on iPhone Takes Two Paths
A single HEIC and a group of HEICs solve different problems, even before you tap Share. One file needs to become one page. A group of files needs to become a document with page order, spacing, and a layout that still makes sense after export.
One image versus many images
If you only need to send one receipt, one ID photo, or one form capture, the job is simple. Turn that single HEIC into a PDF on the iPhone itself. Apple and Adobe both describe native iPhone workflows that handle that path directly through Files or the print/share route Adobe workflow. That is the cleanest use of built-in tools.
Several photos change the job. A passport page, a proof-of-address image, and a supporting document are no longer separate files in practice, they need to read as one packet. Apple’s support history matters because iPhone has long handled HEIF and HEVC well for capture and storage, while PDF is usually the safer delivery format for portals, inboxes, and older software Apple Support.
For a quick background on what HEIC is, see this HEIC overview. The key point is simple. A photo can be perfectly valid and still arrive in a wrapper the destination does not want.
What you should expect from the conversion
Good iPhone handling should let you make the right choice for one image or many. It should also make clear whether you are creating a simple PDF container or a file that needs to fit a specific page size and upload limit. Then you still need to check the result before you send it.
That last step gets missed often. A PDF can convert correctly and still fail at the other end if the page framing, image scale, or file size does not match the portal’s rules. Native iPhone tools and documented Adobe workflows make the conversion easy enough, but they do not decide whether the final PDF is ready for submission.
Turning One HEIC Photo Into a PDF With the Files App
A single HEIC photo is the easiest case. If you have one receipt, one form photo, or one page you need to send, start in Photos, tap Share, then choose Save to Files and place the image in a folder you can find again. That gives you a local copy the Files app can work with.
Next, open Files, find the saved HEIC, and press and hold it. On supported iPhone versions, Quick Actions or Create PDF should appear, turning that one image into a PDF without another app Adobe’s iPhone workflow. The new PDF sits beside the original photo, so you can keep both if you need to compare them later.
What the Files method does well
This path stays on the phone. There is no upload, no account, and no browser tab, which makes it a good fit for a private receipt, an ID photo, or any file you do not want leaving the device just to be converted.
It is also quick. For a basic one-photo PDF, you usually do not need to think about extra steps or settings. Apple’s export tools show that iPhone can work with formats such as HEIC, JPEG, PDF, PNG, and TIFF, so PDF output is part of the device’s native file handling rather than a trick added by another app Apple Support.
Where it starts to feel limited
The trade-off is control. The Files workflow does not give you page-size choices, a quality slider, or a way to adjust metadata before saving. There is also no fit-to-page control, so a photo that looks fine on screen can still be a poor match for a portal with strict layout rules.
A local workflow is private and convenient, but it is still a blunt tool. If the destination checks page size or file size closely, the result may need a more precise conversion method.
Combining Multiple HEICs Into One Multi-Page PDF
A folder full of receipts or document scans needs a different approach from a single photo. Put the HEICs in the same Files folder, tap More, choose Select, mark the images, tap More again, and pick Create PDF. iPhone then combines the selected files into one document Adobe’s batch workflow.
That works well for expense claims, passport copies, or any set of images that should stay together. One attachment is easier to send than a stack of separate photos, and the whole workflow stays on the phone while you build the PDF.
The ordering trap to watch for
Files gives you almost no warning about page order. The sequence you select is the sequence that lands in the PDF, and there is no simple reorder screen afterward. If order matters, rename the files first with a clear numbering pattern.
That helps when camera order and reading order are different. A passport page and supporting scans are easier to combine correctly when the filenames already point to the right sequence.
What the batch workflow still can’t control
The same limits from the single-photo route still apply here. In Files, you do not choose A4 or US Letter, you do not adjust compression, and you do not review metadata before saving. You get a combined PDF, not a carefully tuned submission file.
That convenience has a ceiling. If the only goal is to put several HEICs into one file, this method is enough. If the destination checks page layout closely, or expects tighter control over the finished PDF, you may need a different tool.
Choosing Between Native, Print-Preview, and Browser Converters
A single HEIC photo and a stack of HEICs are not the same job. For one image, the native Create PDF route is usually enough. For several images, a browser converter or another controlled tool often fits better, because the native options on iPhone do not give you much room to shape the final file.
The print-preview trick as a backup
Apple and Adobe both document a route that starts in Photos, goes through Share > Print, and then uses a two-finger spread on the preview to open the page as a PDF before sharing it onward Adobe print route. It is useful when the Files action is missing or awkward, and it can save you from starting over.
The trade-off shows up quickly. Print preview often produces a PDF that behaves like a printed page, so the image may sit inside margins instead of filling the sheet edge to edge. That is fine for a quick handoff, but less comfortable if a portal checks the layout closely. A form system that expects a clean upload may accept the file, yet still reject it if the image sits too loosely on the page.
When a browser converter earns its place
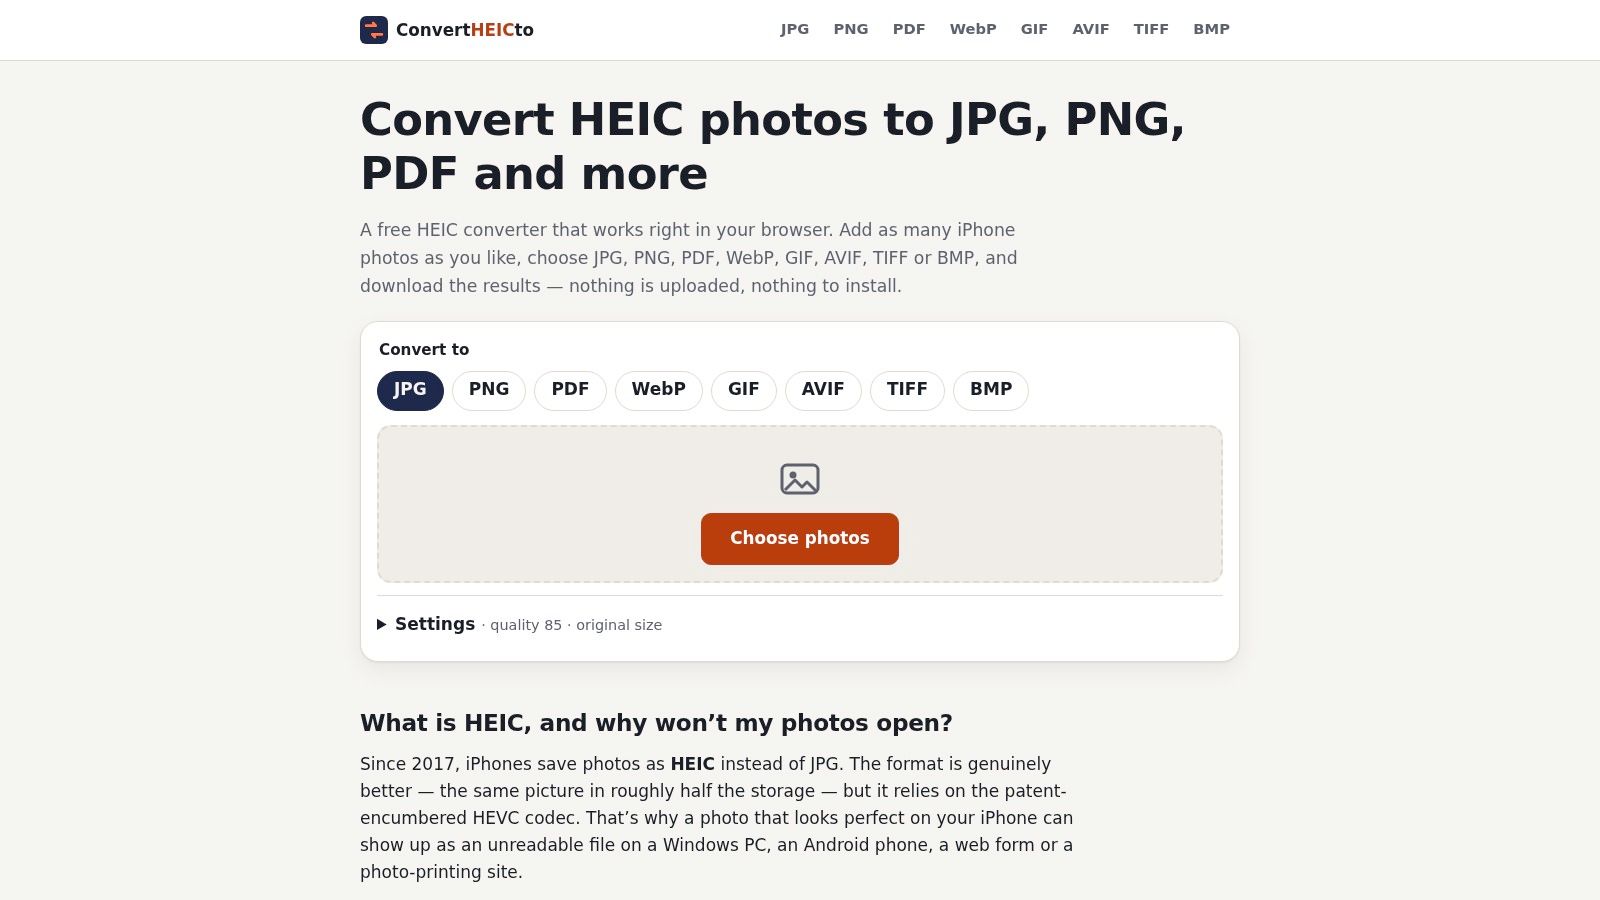
A browser-based converter makes more sense when the PDF has to meet a rule, not just exist. You may need A4 or US Letter, tighter fit-to-photo behavior, compression choices, or a batch process that keeps the result predictable. For a closer look at how HEIC handling changes before conversion, see ConvertHEICto’s HEIC to JPG guidance. It reflects the same privacy-first approach, processing in the browser instead of sending files away.
| Scenario | Best Method | Why |
|---|---|---|
| One photo for quick sharing | Native Files Create PDF | Fast, built into iPhone, stays on device |
| Several photos that belong together | Batch Files Create PDF | Makes one multi-page PDF from a folder |
| A picky portal with page or size rules | Browser converter | Lets you control layout and output settings |
| Files action missing or unreliable | Print-preview pinch trick | Built-in fallback from Photos to PDF |
A practical detail matters here. Browser tools can give you a more controlled file size, while print preview often creates a file that is good enough for sharing but less predictable for strict submissions. Native methods keep the file on the phone, and a browser tool that processes locally avoids the upload risk that comes with many online converters.
Controlling Page Size, Quality, and Metadata Before You Convert
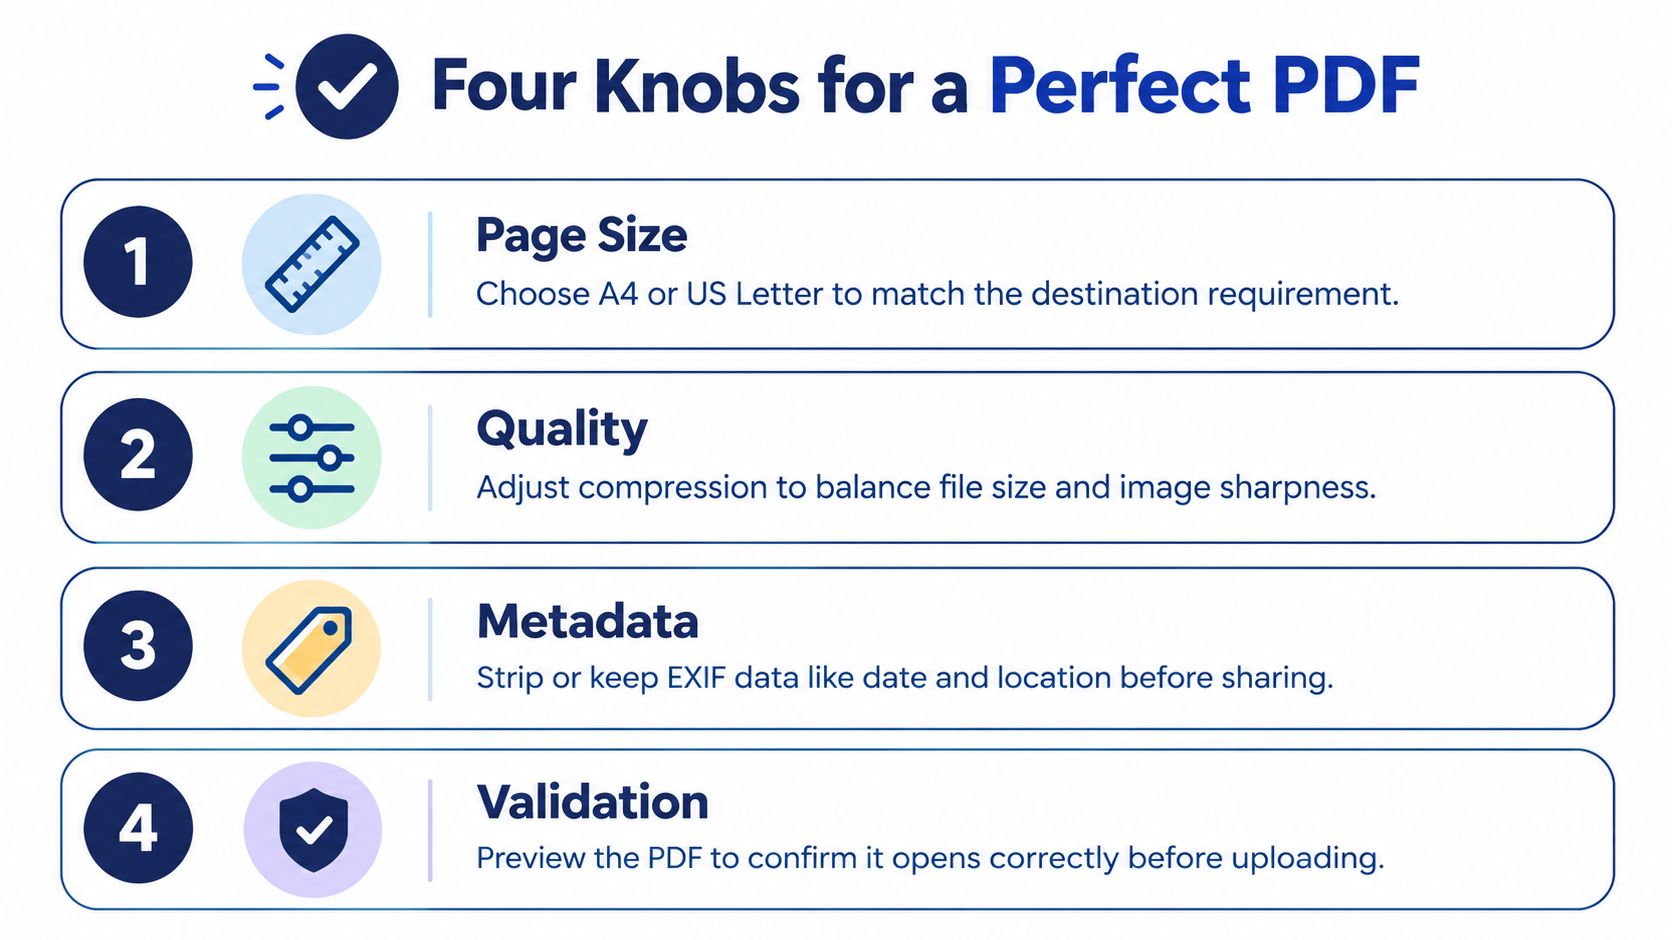
This is the part you only think about after a rejection. A portal doesn’t care that the photo looked fine in Photos, it cares whether the PDF fits its rules. Four controls matter most here, page size, fit-to-photo behavior, compression, and metadata.
Why those four controls matter
Page size decides whether the document lands in the shape the destination expects, often A4 or US Letter. Fit-to-photo determines whether the image fills the page cleanly or sits inside awkward margins. Compression affects sharpness and file size. Metadata decides whether hidden details like date and location survive the conversion.
That last part surprises a lot of people. Photos can carry EXIF data, including location, and a careful workflow may need to remove it before sharing. A browser-based converter can expose those choices directly, while the Files app generally doesn’t.
Useful habit: if a portal has a size cap or a strict page requirement, treat export settings as part of the job, not an afterthought.
What a browser converter gives you that Files doesn’t
A controlled browser tool can expose settings that the native PDF action hides. That includes JPEG quality sliders, lossless PNG for image output, TIFF compression choices, resizing by maximum edge, and metadata toggles. ConvertHEICto’s feature set also includes Display P3 to sRGB handling, orientation correction before saving, and a GPS toggle that removes location by default unless you choose otherwise.
That matters in practical terms. If you’re submitting a passport scan to a visa portal with a file-size cap, you may need to reduce the output without making the photo unreadable. The page still has to look like a document, but it also has to pass the upload check. A browser converter gives you the levers to balance those requirements.
Why Your Converted PDF Might Still Get Rejected
A PDF that opens on your phone can still fail in a portal, and the reason is usually simple. The page is framed wrong, the file is too big, the colors shifted, or the metadata triggered a rule. Conversion and acceptance are not the same thing.
Four failure modes to check first
If the image looks cropped or boxed into a larger page, the cause is usually the page framing. Try a fit-to-photo or page-size setting first. If the file is too large, reduce the quality or compression before you convert again.
If the colors look different after conversion, the issue may be the profile handling. HEIC files can carry richer color information, and a converter that doesn’t manage that properly may not preserve the appearance you expected. If a compliance portal flags the file or asks for a cleaner submission, look at metadata next, especially location data.
The print-preview trick has its own risk. Because it behaves like a print job, it can preserve print-oriented margins and framing that look acceptable on screen but fail stricter page-size checks. That’s why it’s better as a fallback than as a precision tool.
What to inspect before you retry
Check the file on the phone before sending it again. Open the PDF, confirm the page count, verify the orientation, and make sure the image fills the page the way the destination wants. If the portal rejected the file once, don’t assume the second upload will behave differently unless you changed something specific.
A good habit is to fix one variable at a time. Don’t change compression, page size, and metadata all at once unless you have to. If you do, you won’t know which fix solved the problem.
Quick Decision Guide for Your Next HEIC to PDF Job
If you’re sending one photo and you just need it in PDF form, use the native Files Create PDF route. It’s quick, private, and enough for a simple attachment.
If you’re bundling several HEICs into one document, use the batch Files workflow and rename the images first so the page order stays predictable. If the PDF has to satisfy page-size, color, or file-size rules, use a browser converter with controlled settings. For a privacy-minded browser option, see how to turn off HEIC on iPhone as a reminder that future capture settings and current-file conversion are different jobs.
The takeaway is simple. You want a PDF that opens and one the portal, printer, or inbox will accept. Once you start choosing the method based on that outcome, HEIC stops being a problem and becomes just another file format you know how to handle.
If you want a private, browser-based way to turn iPhone HEIC files into PDFs with more control over page size, quality, and metadata, visit ConvertHEICto. It’s built for exactly this kind of job, especially when native iPhone tools are too basic for the file you need to submit.