
Someone with an iPhone sends you a photo, and your Android phone treats it like a mystery file. You see a blank thumbnail, a name ending in .heic, or an upload form that just says the file isn’t supported. You’re not doing anything wrong. The photo uses a newer format that some Android phones, apps, and websites still can’t read.
You don’t need to ask the sender to retake it, and you don’t need to upload a private picture to a random server. You can convert HEIC to JPG on Android right in your phone browser, then choose how sharp the copy should be and whether it still carries the place where it was taken. That second choice matters more than most guides admit.
Table of Contents
- Why HEIC Fails on Android and Why JPG Still Wins
- Pick a Conversion Method for This Photo
- Set JPG Quality and Metadata on Purpose
- Convert HEIC to JPG in the Phone Browser
- Batch Photos and Fix a Failed Convert
- Send the JPG and Keep the Right Copy
Why HEIC Fails on Android and Why JPG Still Wins
Say an iPhone photo lands in your Gmail or WhatsApp, and you need it for a school portal or a warranty claim. Your Gallery won’t preview it, or the form refuses it and asks for a JPG. That happens because HEIC has been Apple’s default camera format since 2017. It’s a HEIF container holding an HEVC image, designed to keep similar quality in a smaller file than JPEG.
Android didn’t get one clean HEIC switch. Android’s HEIF camera documentation describes staged support, with HEIF decoding listed from Android 9.0 and native HEIC camera and encoding support arriving with Android 10 in September 2019. Some devices could decode HEIF from Android 8.0 in supported implementations. The same documentation notes camera support depends on the phone having an HEIC or HEVC encoder, and HEIF encoding from Android 10 is device-optional, while JPEG encoding and decoding are listed as supported.
So checking your Android version doesn’t settle it. A new phone may open the file while an older tablet, a chat app, or a website still can’t. If you’re weighing the formats themselves, our guide to HEIC versus JPG trade-offs covers size and quality in plain terms.
The diagram below shows the usual path from arrival to rejection to a file that works.
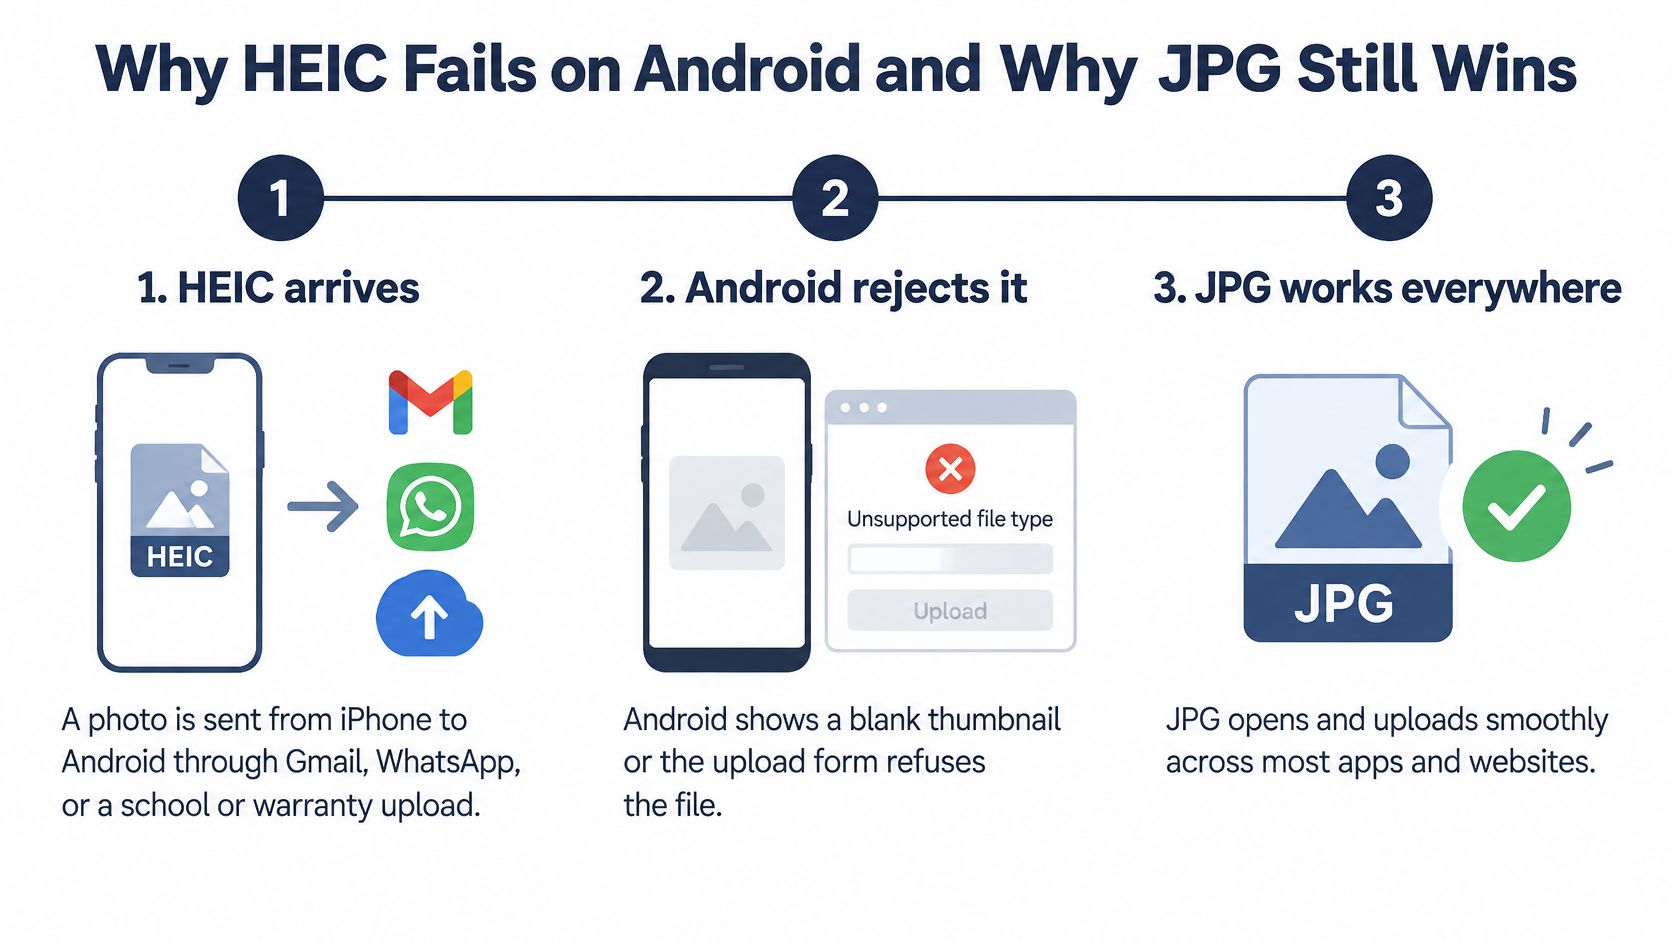
A working preview on one phone doesn’t prove a form, app, or second phone will accept the same HEIC.
Your goal is simple. Make a JPG on this device, decide its quality and metadata first, and only then send it on.
Pick a Conversion Method for This Photo
The best default is an in-browser converter that processes the file locally. You don’t install anything, the photo doesn’t need to be uploaded, and several files can come back together as a ZIP. The other routes still have uses, but each solves a narrower problem.
Don’t start by browsing app store listings. Start by asking where the photo needs to go next, how many files you’ve got, and whether the picture is private. Those three answers pick the method for you.
Ways to Get a JPG From an HEIC on Android
| Method | Where the file goes | Batch fit | Use it when |
|---|---|---|---|
| In-browser converter on this phone | Stays on the device when processing is local | Many files, then a ZIP | Private shots or more than a couple of photos |
| Gallery or photo app that already opens it | Stays inside that app unless you share it onward | Usually one photo | A single picture you can already preview and save as JPG |
| Another Android phone on version 10 or later | Moves to that phone | Poor for a folder | Only to check whether HEIC opens at all |
| Back on the iPhone, Most Compatible | Originals must still be on the iPhone | Future camera-roll shots | Stopping the next HEIC, not fixing the file already downloaded |
Who Should Take Each Route
Use the browser route first if the photo is personal, work-related, or part of a set. It’s also the cleanest answer when a form rejected the HEIC and you need a standard JPG quickly. You keep control of quality and metadata in one place, instead of hoping a share button guesses right.
A Gallery or photo app is fine for one casual photo you can already see. If it offers Save as JPG or Share as JPG, try it and then reopen the result. Watch for a cheap trick here. Some apps only rename the file from .heic to .jpg without changing what’s inside, and the next app still chokes on it. A real conversion rewrites the image data. A rename doesn’t.
Borrowing a newer Android phone only answers a narrow question, whether any device nearby can decode the file at all. It doesn’t organize a folder, it moves your photo onto someone else’s phone, and that phone may preview HEIC yet offer no useful JPG export. Treat it as a test, not a workflow.
Asking the iPhone owner to switch the camera to Most Compatible helps next time. New shots will arrive as JPG, so you won’t repeat this dance. It won’t touch the HEIC already sitting in your Downloads folder, and it isn’t always your call to make on someone else’s phone anyway. The sender may prefer HEIC because it uses less storage.
Practical rule: If the photo is private, or you’ve got more than two files, skip the workarounds and use the browser method.
That leaves two settings worth deciding before you tap Convert, because changing your mind after a batch means doing the batch twice.
Set JPG Quality and Metadata on Purpose
Quality and metadata are two separate switches. Quality controls how much detail the JPG keeps and how large it gets. Metadata controls what hidden information rides along inside the file, such as the date taken, the camera model, and GPS coordinates. Most guides only mention the first switch. The second one is where privacy lives.
Android’s supported media formats documentation sits behind the practical workflow here, including platform support for JPEG encoding and decoding and device-dependent HEIF decoding from Android 9 onward. A sensible policy drawn from that workflow is quality 90 to 95 for archival sharing, 80 to 90 for messaging or forms, and 75 to 85 for smaller web uploads.
JPG Quality and Metadata Presets
| Job | JPEG quality | Date and camera | GPS |
|---|---|---|---|
| Insurance, archive or later editing | 90-95 | Keep | Keep only if the place matters |
| Chat, tickets and public forms | 80-90 | Keep the date if the timeline matters | Remove |
| Web or portal upload with a size cap | 75-85 | Optional | Remove |
Why Quality Numbers Aren’t Promises
A quality setting isn’t a grade out of 100, and it doesn’t guarantee a file size. Two photos at quality 88 can end up very different sizes because dimensions, bit depth, chroma subsampling, and the encoder itself all change the result. A busy photo of trees and gravel compresses worse than a clean shot of a white wall at the same setting.
Color can shift too. Many iPhone photos use a wide color gamut, while a standard JPG for web and forms usually needs sRGB. The converter has to translate those colors, and very saturated reds or greens may look slightly flatter afterward. HDR detail can also flatten into a normal SDR image. For a form or a chat, that’s fine. For later editing, keep the original HEIC as your master copy.
If you want the mechanics of changing formats explained step by step, see our walkthrough on how to change a photo format to JPEG. The short version is that you’re decoding one format fully, then encoding a new file with your chosen settings.
The Metadata Mistake Most People Make
People hear that metadata can expose their location, so they strip everything. That does hide the GPS coordinates, but it also removes the capture date, which breaks albums sorted by time and can hurt an insurance claim where the timeline is the whole point. You’ve traded a small privacy win for a real organizational loss.
The better habit is surgical. Remove GPS, keep the date and camera details. A photo of a cracked bumper for a support ticket doesn’t need to reveal your home address, but it may need to prove when it was taken. A family archive copy is different again. There, keeping location can be a feature, because future you may want to search photos by place.
Preserve everything isn’t best practice. Neither is delete everything. Keep what’s useful for this recipient, and drop what could expose you.
Think of it as two presets you’ll reuse. A privacy-safe JPG for classifieds, tickets, listings, and strangers drops GPS. A metadata-preserving JPG for archives, claims, and editing keeps date and camera info, and keeps GPS only when the location is important. Pick the preset based on the destination before you convert a batch, not after you’ve already sent the first file.
One more warning belongs here. A .heic extension doesn’t prove your phone can decode the file, and a .jpg extension doesn’t prove the output is healthy. Whatever preset you choose, you’ll validate the result by reopening it rather than trusting the filename.
Convert HEIC to JPG in the Phone Browser
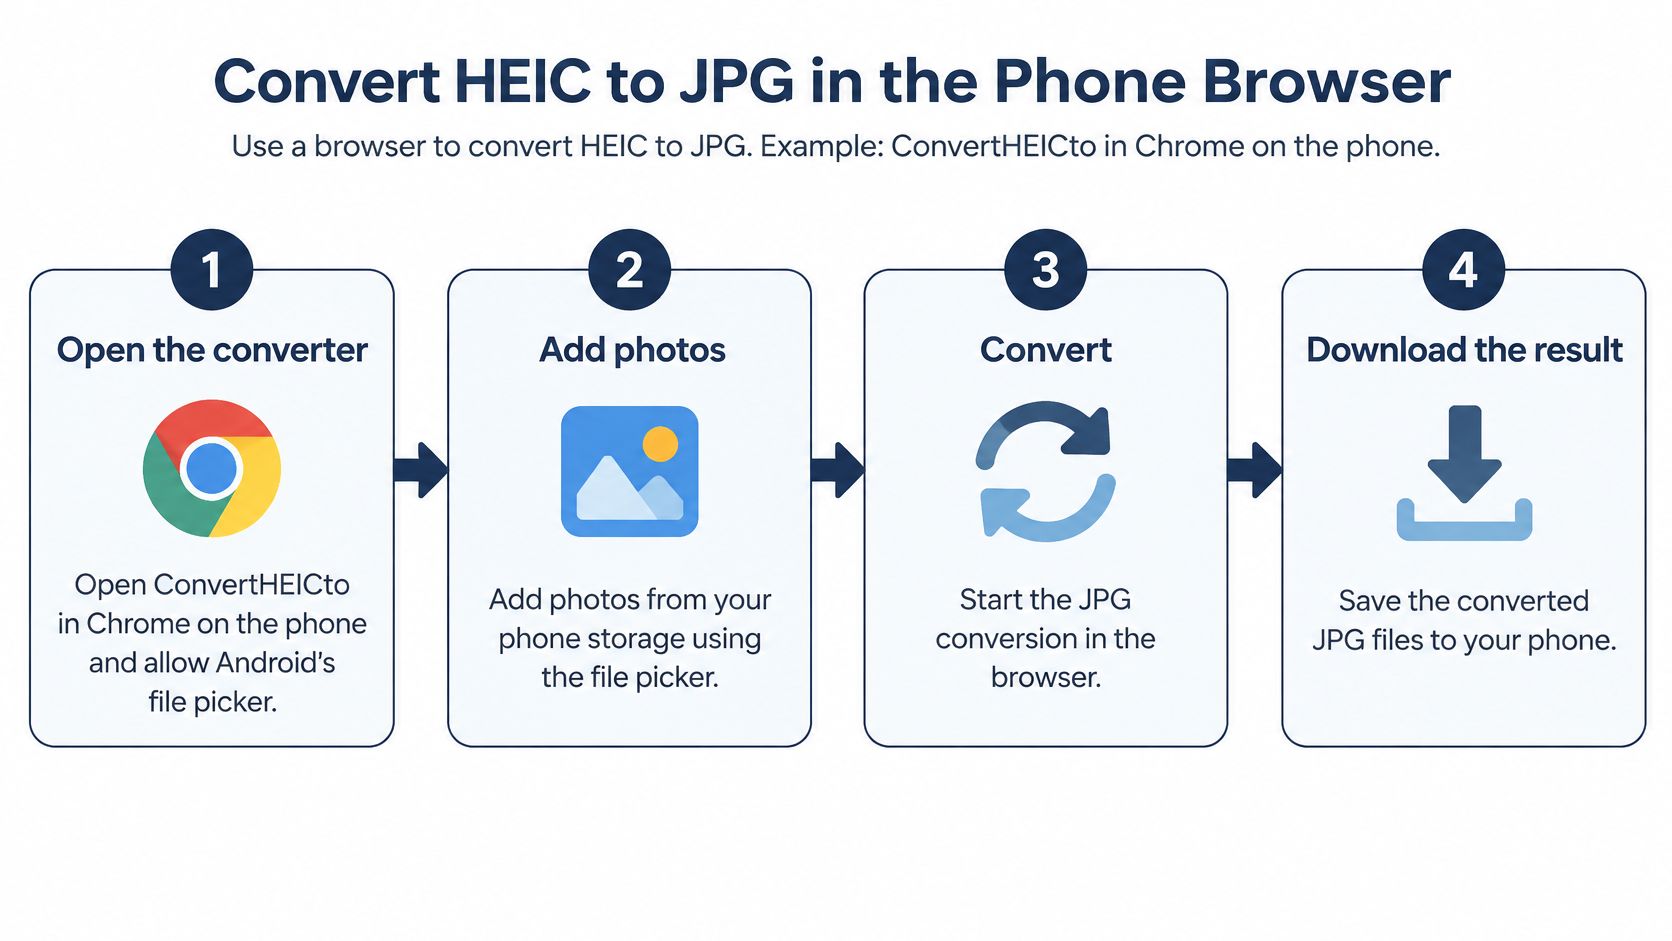
This is the default procedure. We’ll use ConvertHEICto in Chrome as the working example, because the conversion happens inside your browser on your device. There’s no upload step and no server copy, which is why this route suits private photos.
The flow looks like this at a glance.
The Seven Steps
- Open the converter and allow the file picker. Open the site in Chrome, tap the option to add photos, and let Android’s system picker appear. Using the system picker matters because you’re granting access to the files you choose, not handing an app broad storage permission it may not need.
- Add your photos. Pick files from Downloads, WhatsApp media, or Google Photos. Files ending in .heic, .heif, or .hif are all read by the converter. Don’t treat a familiar extension as proof the decode worked. The next step is your proof.
- Wait for a real preview. Each photo should show an actual thumbnail. If a preview stays blank, stop there. Saving anyway can give you an empty or broken JPG that wastes more time than pausing now. A blank preview is information, not a step to push through.
- Choose JPG and set size. Select JPG as the output format and apply the quality band you picked for this destination. For a very large original, cap the long edge to a smaller maximum. That produces a file portals accept more easily and keeps a low-memory phone from stalling on a huge bitmap.
- Apply your metadata preset. Keep the date taken and camera details for the copies usually sent, and leave GPS off unless this specific copy is an archive where location helps. Don’t rethink this decision per photo. You made it based on where the files are going.
- Convert and download. Run the conversion in the browser tab and keep the tab open until it finishes. Download a single JPG for one photo, or take the ZIP when you’ve converted a set. Because processing is local, a slow connection doesn’t slow the conversion itself, only the initial page load.
- Reopen the JPG and check it. Open the result in Gallery. Confirm it’s upright, the dimensions look right, and the picture isn’t cropped oddly. If a website still refuses it, check the file details and confirm the type reads image/jpeg, not just a .jpg name on something else.
Why Photos Sometimes Come Out Sideways
iPhones often store a photo in one orientation and record a rotation instruction in the metadata telling viewers to turn it. Good viewers obey. Some forms and older apps don’t. The fix is to apply that stored rotation to the actual pixels before the JPG is written, so the new file is upright on its own and doesn’t depend on instructions. Our converter does that before saving, so photos export upright.
If you’d rather watch the process once before trying it, this short video walks through a phone conversion.
Notice what you didn’t do. You didn’t create an account, upload anything, or install an app with permissions you now have to manage. For a task you’ll repeat every time an iPhone owner sends you photos, that simplicity is the point.
Before you send anything: reopen the JPG, check it’s upright, and confirm the size looks sane. Thirty seconds here prevents a bounced upload later.
Batch Photos and Fix a Failed Convert
A single photo is easy. A burst of school play pictures or a set of damage photos is where people lose files, usually by saving them one at a time from the notification shade and losing track of which ones finished. There’s a calmer habit.
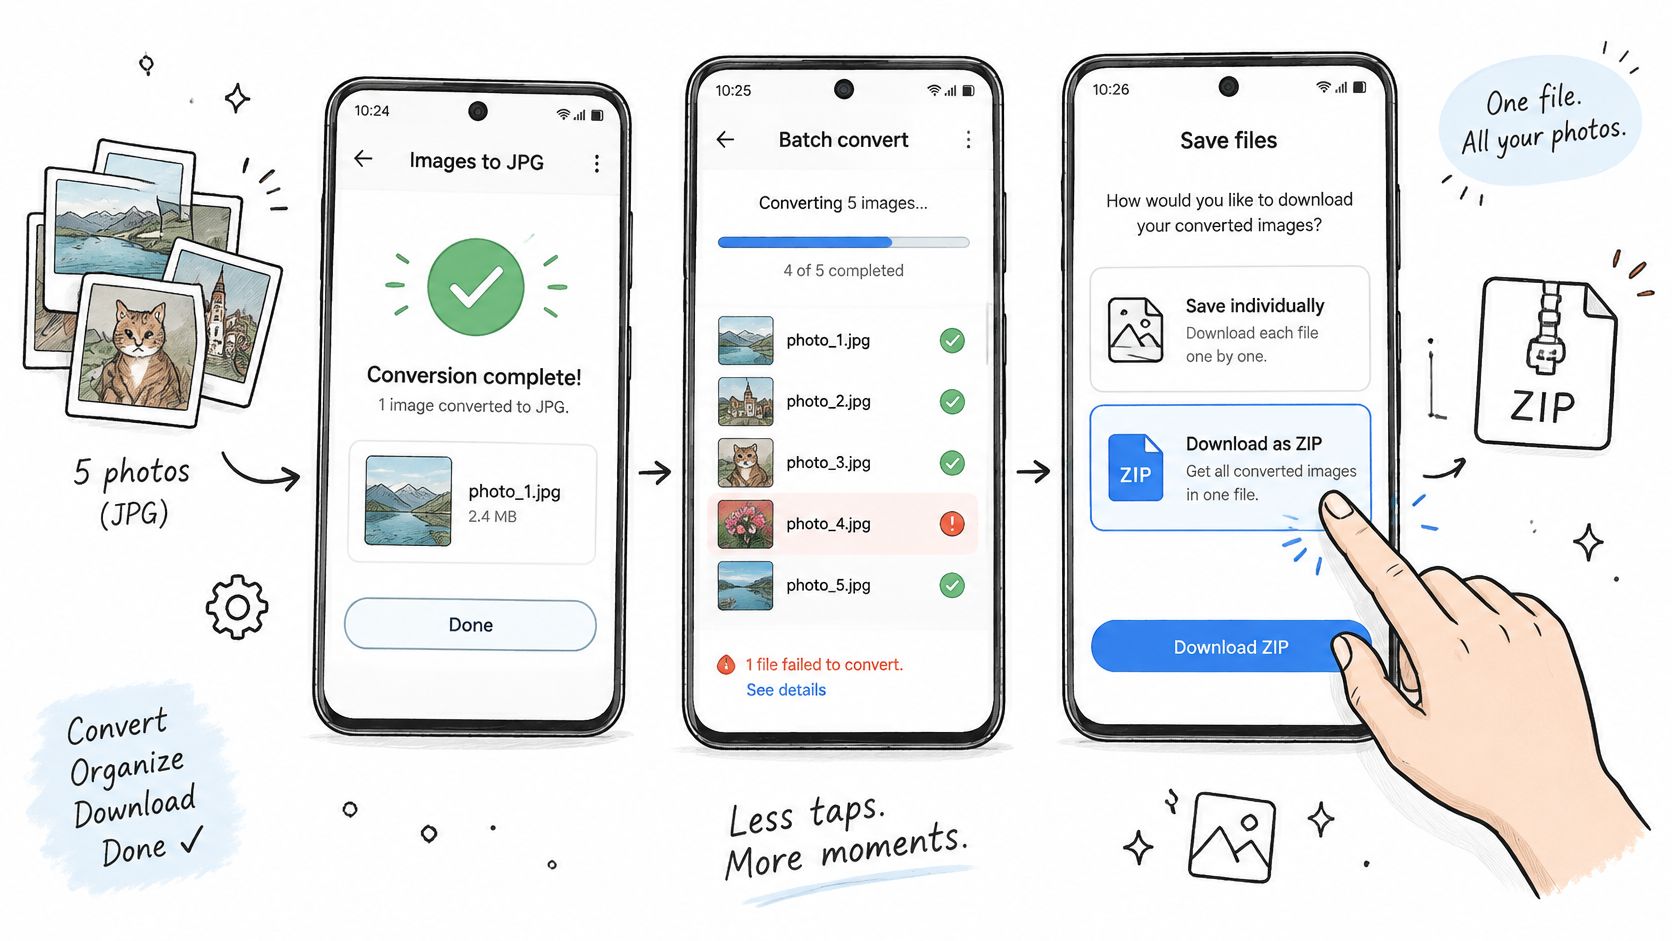
Add the whole set, convert once, and download the ZIP. Then extract it into one folder and check the contents against your originals. Keep every HEIC until its JPG reopens correctly in Gallery. Only then is the copy trustworthy enough to replace it for sending purposes.
On a phone with little free memory, split a large set into groups of five to ten, especially when originals are 12 megapixels or more. Decoding several huge photos at once is exactly how a tab stalls. Smaller groups finish cleanly and make it obvious which group contains a problem file.
For more on handling big sets without chaos, our guide to using a HEIC to JPG batch converter goes deeper on ZIP downloads and naming.
The screenshot below shows the batch view, with several files queued for one download.
Symptoms and Fixes After a Failed Convert
| Symptom | Likely cause | Fix |
|---|---|---|
| Blank preview | This browser or device cannot decode HEIF | Retry in Chrome or move the file to a phone on Android 10 or later |
| Phone stalls during batch | Low free memory with 12 MP or larger originals | Convert in groups of five to ten photos |
| Enormous JPG | Quality left near the top or no resize | Use the 80-90 preset and cap the long edge |
| Portal rejects a real JPG | Size cap or the portal asks for PNG | Apply the 75-85 preset or export PNG as a different export |
| Sideways picture | Stored rotation not applied | Apply rotation before the JPG is written |
| Live Photo gives one frame | Only the still frame is exported | Accept the still frame or keep the HEIC |
Reading the Failures Correctly
A blank preview is the most misread symptom. It doesn’t mean your photo is corrupt. It usually means this browser or device can’t decode HEIF, so retrying in Chrome or on a newer phone is the right test. Repeatedly tapping Convert on a file that never decoded won’t help.
A portal rejecting a genuine JPG also isn’t a HEIC failure anymore. Read the error closely. Many forms enforce a file size cap, and some ask for PNG specifically. Shrinking the JPG solves the first case. The second case needs a different export, which is a format choice, not a broken conversion.
A Live Photo deserves a quick note. Converting it gives you the still frame, because a JPG is a single image. The short motion clip isn’t in the JPG, so keep the original if that movement matters to you.
If you’re stuck after trying the matching fix, gather four details before asking for help: your phone model, Android version, browser, and the exact error text. A screenshot of the error helps too. Those details turn a vague it doesn’t work into something someone can diagnose.
Send the JPG and Keep the Right Copy
You’ve got a JPG that opens. Now make the send decision deliberately instead of firing off whichever file is nearest the top of your recents.
If Gallery shows the JPG upright and your chat or form accepts it, send that copy. Keep the HEIC only when you might still edit the photo seriously later, because it’s the richer original. For everything else, the JPG is the version that travels well and causes nobody else a headache.
Sending to a stranger, a listing, or a support ticket calls for one last check. Confirm GPS is gone and the capture date is still there. That combination protects your location without destroying the timeline. Sending to family for a shared album is more relaxed, though the same privacy-safe copy rarely hurts.
Don’t delete the HEIC from Downloads until the recipient confirms the JPG opened. Making a second, smaller JPG is far easier than asking the iPhone owner to resend the original.
Set Yourself Up for Next Time
Create a folder with a plain name like JPG-to-send and put converted copies there. That stops HEIC originals and JPG copies mixing together in your recents, which is how people accidentally attach the wrong one under time pressure. A consistent folder also makes it obvious what still needs sending.
For the next batch from the same iPhone, you’ve got two clean options. Repeat this conversion on your Android, which keeps you independent. Or ask the sender to set their camera to Most Compatible, so new shots arrive as JPG from the start. The second option is polite to suggest once, but don’t depend on it. Their storage, their choice.
The practical next tap is the local browser converter. It’s free to use, conversion runs inside your browser with no upload and no server copy, and the date taken plus camera details stay while GPS is removed unless you choose to keep location. That’s the combination this whole task turns on, compatibility without handing your photos to a stranger’s server.
Keep the original when the photo matters. Send the JPG when the photo needs to work. Most days, you’ll do both, and that’s not clutter. It’s a master copy and a traveling copy, each doing the job it’s good at.
Open ConvertHEICto in Chrome on your Android phone, add the HEIC that won’t open, and download a JPG that your apps and upload forms will accept. Your photos are converted inside your own browser with no upload and no server copy, the date taken and camera details stay, and GPS is removed unless you choose to keep it. Convert one stubborn photo now, check it in Gallery, and send it with confidence.